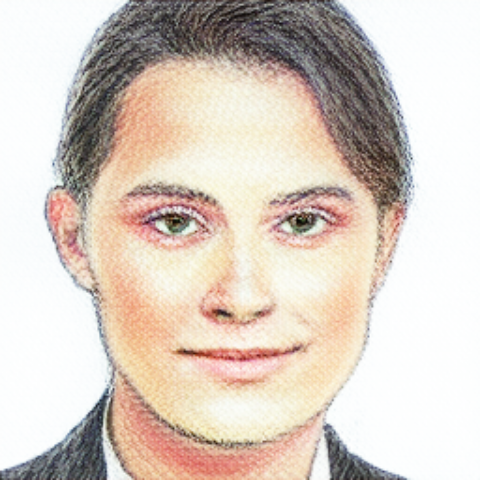
The MediaPipe Face Stylizer task lets you apply face stylizations to faces in an image. You can use this task to create virtual avatars in various styles.
The code sample described in these instructions is available on GitHub. For more information about the capabilities, models, and configuration options of this task, see the Overview.
Code example
The example code for Face Stylizer provides a complete implementation of this task in Python for your reference. This code helps you test this task and get started on building your own face stylizer. You can view, run, and edit the Face Stylizer example code using only your web browser.
Setup
This section describes key steps for setting up your development environment and code projects specifically to use Face Stylizer. For general information on setting up your development environment for using MediaPipe tasks, including platform version requirements, see the Setup guide for Python.
Packages
The MediaPipe Face Stylizer task requires the mediapipe PyPI package. You can install and import these dependencies with the following:
$ python -m pip install mediapipe
Imports
Import the following classes to access the Face Stylizer task functions:
import mediapipe as mp
from mediapipe.tasks import python
from mediapipe.tasks.python import vision
Model
The MediaPipe Face Stylizer task requires a trained model that is compatible with this task. For more information on available trained models for Face Stylizer, see the task overview Models section.
Select and download the model, and then store it in a local directory:
model_path = '/absolute/path/to/face_stylizer.task'
Use the BaseOptions object model_asset_path parameter to specify the path of
the model to use. For a code example, see the next section.
Create the task
The MediaPipe Face Stylizer task uses the create_from_options function to set up the
task. The create_from_options function accepts values for configuration
options to handle.
The following code demonstrates how to build and configure this task.
import mediapipe as mp

BaseOptions = mp.tasks.BaseOptions
Facestylizer = mp.tasks.vision.face_stylizer
FacestylizerOptions = mp.tasks.vision.FaceStylizerOptions

# Create a face stylizer instance with the image mode:
options = FacestylizerOptions(
    base_options=BaseOptions(model_asset_path=model_path),
with Facestylizer.create_from_options(options) as stylizer:
  # The stylizer is initialized. Use it here.
  # ...
Prepare data
Prepare your input as an image file or a numpy array, then convert it to a
mediapipe.Image object. If your input is a video file or livestream from a
webcam, you can use an external library such as
OpenCV to load your input frames as numpy
arrays.
import mediapipe as mp

# Load the input image from an image file.
mp_image = mp.Image.create_from_file('/path/to/image')

# Load the input image from a numpy array.
mp_image = mp.Image(image_format=mp.ImageFormat.SRGB, data=numpy_image)
Run the task
The Face Stylizer uses the stylize function to trigger inferences. For face
stylization, this involves preprocessing input data and stylizing faces in the
image.
The following code demonstrates how to execute the processing with the task model.
# Perform face stylization on the provided single image.
# The face stylizer must be created with the image mode.
face_stylizer_result = stylizer.stylize(mp_image)
Handle and display results
The Face Stylizer returns an Image object with a stylization of the most
prominent face within the input image.
The following shows an example of the output data from this task:

The output above was created by applying the Color sketch model to the following input image:

